Welcome to Paula's Primary Classroom! This blog is where I share ideas for teaching and learning with families, friends and other early childhood educators. Please don't use the photos or text of this blog without permission, but please do use any ideas you find useful. Thank you for stopping by!
Showing posts with label painting. Show all posts

Sunday, October 11, 2020

How to make a Haunted House Letter H


What could be better for a Halloween letter study than H - for haunted house?!

That's right, this week we're going to start with our letter crafts!  I like to use black and purple paper to make our Haunted Houses, to go along with the Halloween feel.  You'll also need some Halloween cut outs - foam stickers or die cut shapes are easy, and of course scissors and glue.  If you have a flying bat shape to hand from the eaves of your house, you'll also need a needle and thread.

First cut out the uppercase H.  Make two pieces of roof with the narrowest part that is as wide as the uprights on your H.  Cut some crooked rectangles for doors and windows. 

Fold back about a half inch along the sides of each window, and along the top of each roof piece.  Your child will glue only on the folded part, so the windows and doors can hang partly open, and the roof will extend from the house.  Add black cats, ghosts and pumpkins behind each window or door, and if you're hanging a bat from the roof, use a needle and thread to attach it. Ta-da! One haunted house for Halloween!

There are a couple of other ways I like to introduce the Hh sound - one is to put things that start with H in a hat, and have the children name them as I pull them out, emphasizing the Hh sound.  We lay them on a letter H to help make the connection between the sound and the letter.  Items (real or toy) that you might have include horse, hotdog, hats, ham, hammer, hammerhead, hairdryer, hippo and heart.  What else can you and your littles find?

Another fun way to introduce H is to have students ride a hobby horse around a toy house while wearing a hat - lots of letter H things there!  I offer a selection of dress up hats, and let each child take a turn to choose a hat and ride the horse.  As they do, we all sing (to the tune of She'll Be Comin' Round the Mountain) "Ride a horse around a house and wear a hat. /H/ /H/"


Don't have a hobby horse?  Make one!  I've seen hobby horses made with a paper bag stuffed with scrunched up newspaper and a paper towel tube "stick" to ride, but my favorite is a variation on our unicorn craft.  You'll need some poster board or other stiff cardboard, and a paint stirrer or ruler, plus yarn for a mane, and whatever craft supplies your child wants to decorate their hobby horse.

Cut out 2 identical horse head shapes (a quick internet search for horse head silhouette brings up lots).  Staple them together.  Hole punch down the back of the neck where the mane will go (this takes a lot of hand strength and is probably a grown up job).  Have your child help you cut 10"-12" lengths of yarn to loop through each hole to create the mane.  Draw one eye on each side of the horse head (children almost always want 2 eyes on each face, so you may have some vaguely creepy horses) and let your child color the horse however they see fit.  Insert the end of the paint stirrer / ruler and you have your very own hobby horse!

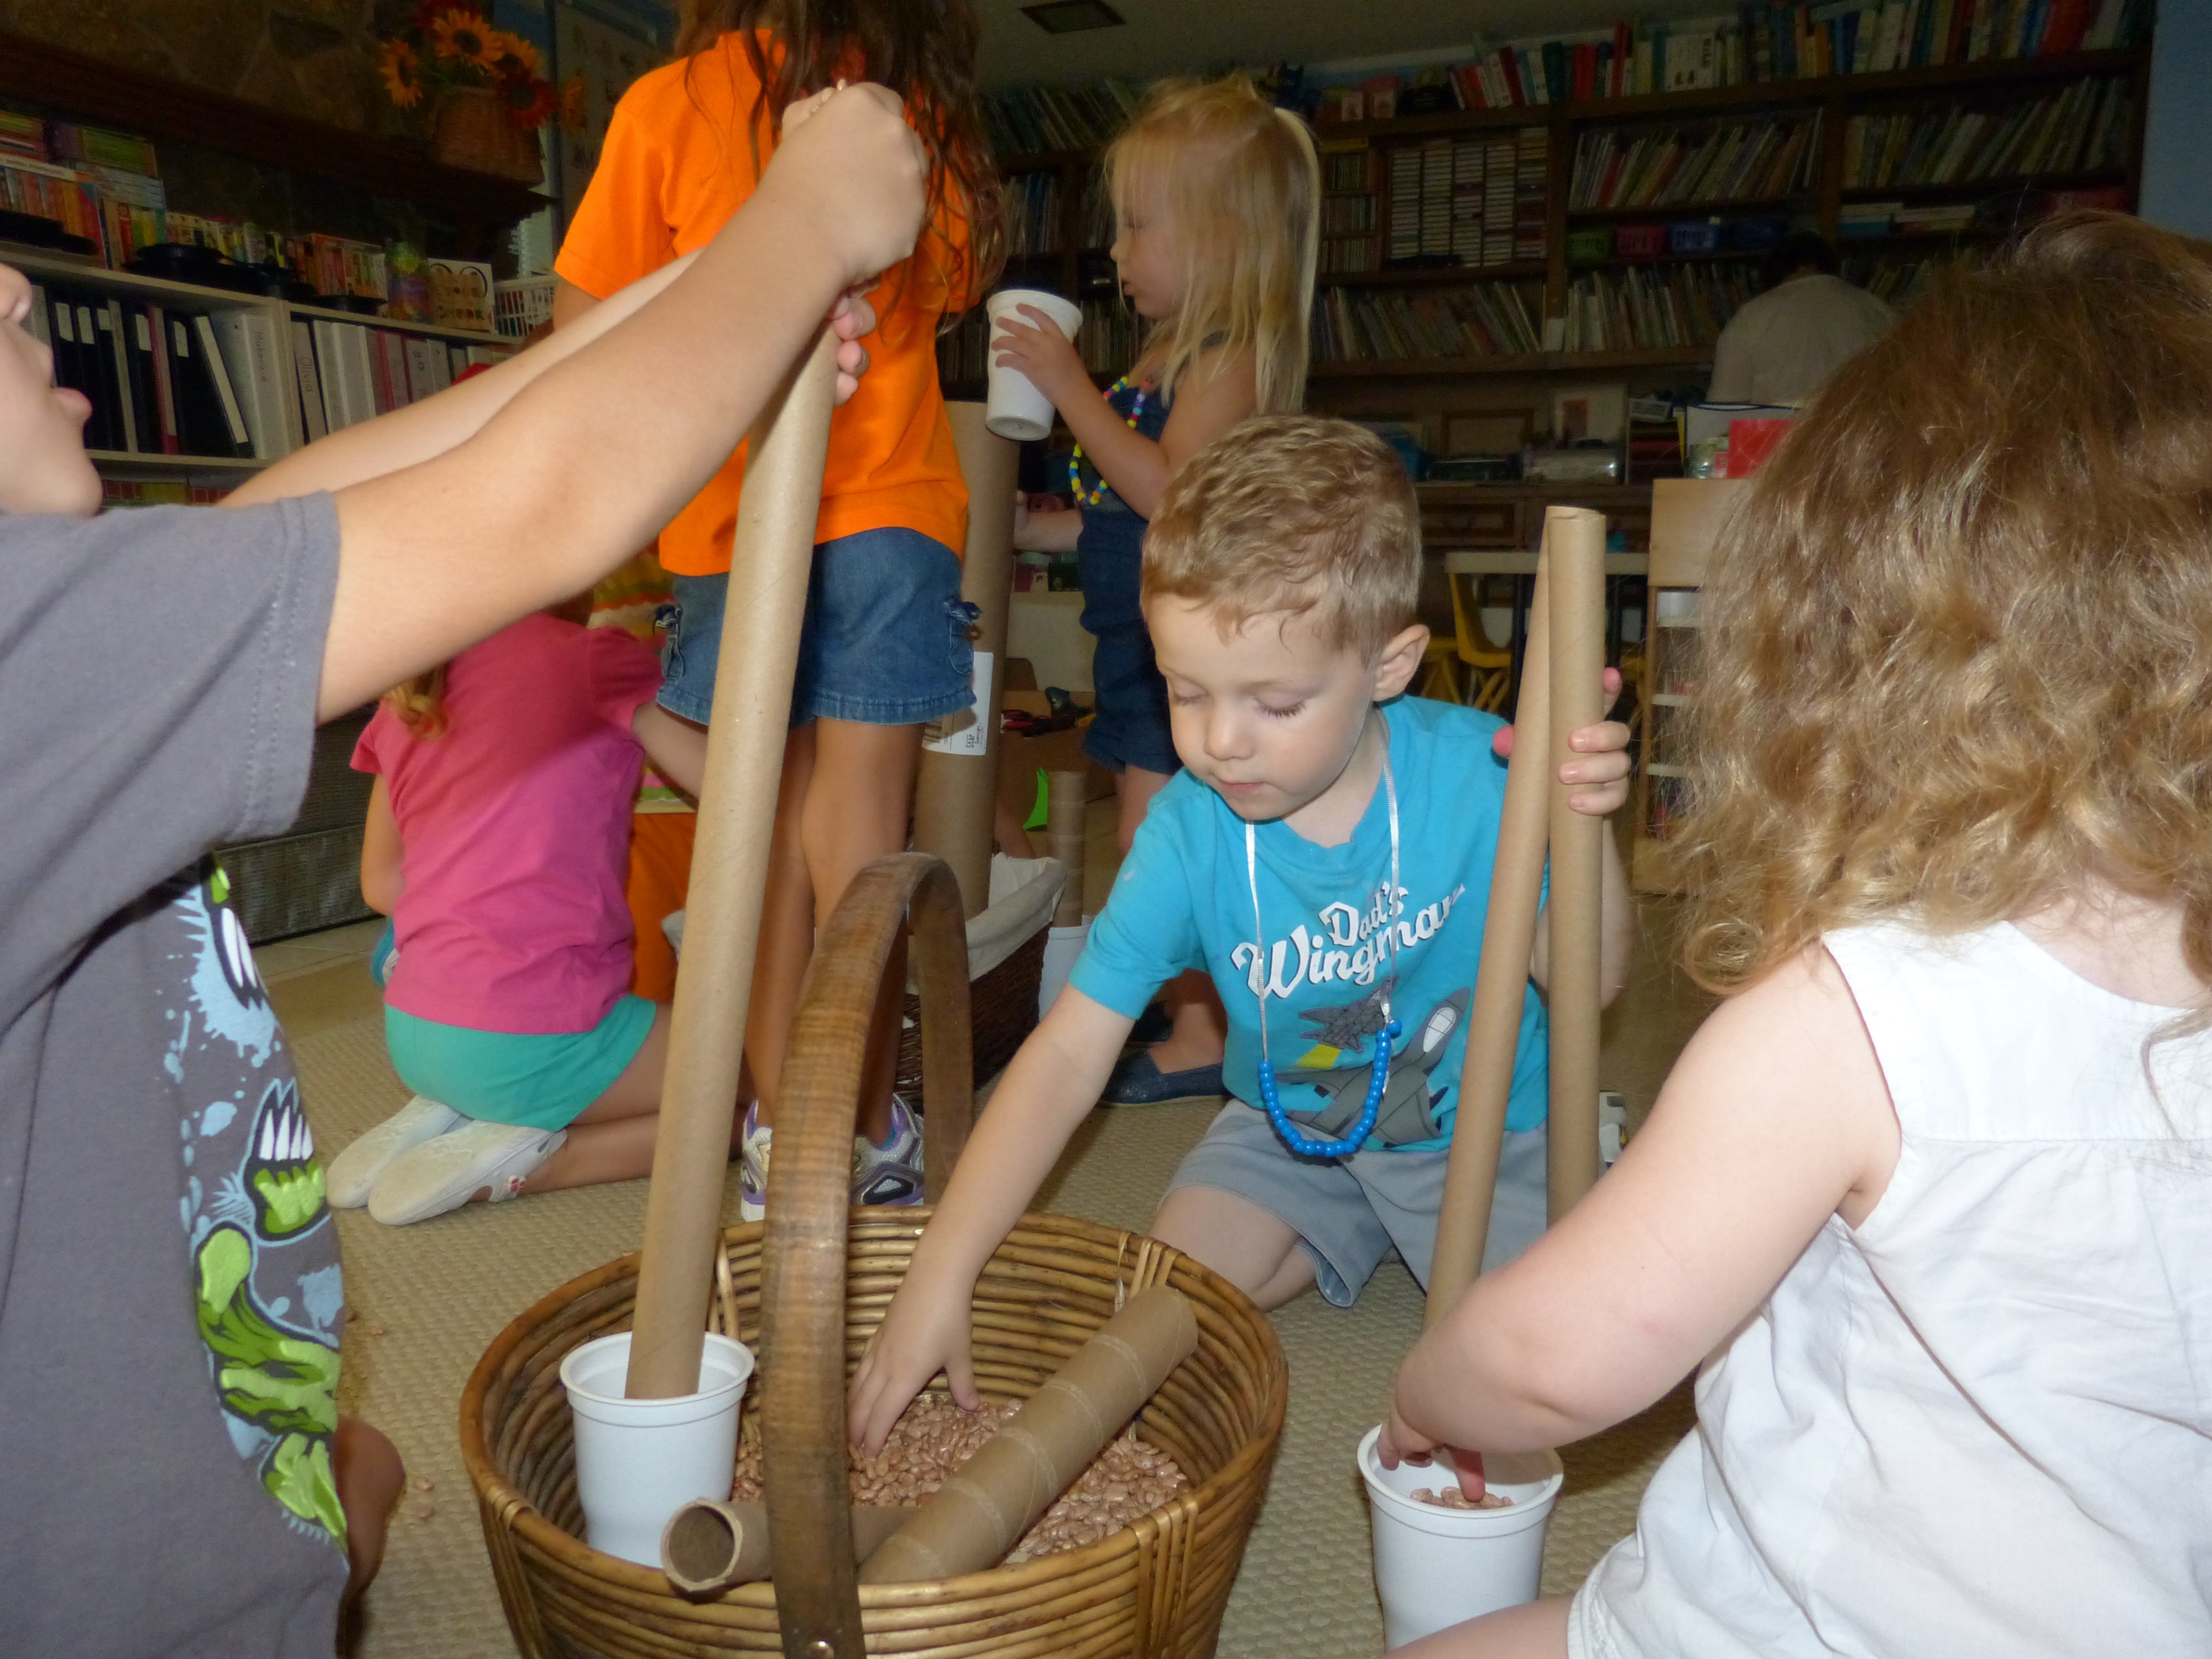
For math skills this week, compare how heavy things are.  Have your child gather items to compare, then hold one item in each hand.  Which one do they think is heavier?  If you have a balance scale it's easy to have them check to see if they were right.  This simple comparison is the beginning of learning to measure!

If you'd like to use this as a math center it's available in my TeachersPayTeachers store, but you can also just compare and explore without the task cards - do what works for you and your little ones!

For your hand print crafts this week you could go a couple of different ways.  Stick with our usual representative hand prints and make a hedgehog or a hippo (that's tissue paper "water" added after the paint is dry)...


...or get into Pop Art and make a Warhol style hand print creation from Artolazzi!

Look up Andy Warhol's work on your computer or in a book, and notice the repetitive prints in bold colors.  If you do this project at home try to get all your family members involved - this looks nice with just the 4 hand prints from one person, but put several sets together and it is super impressive!   

- Choose 4-6 colors of paper and stick with them throughout to make a cohesive project.

- Cut your paper into halves or quarters (halves for adults, quarters for children).  Each person needs 4 pieces for the background.

- Make the paper hands in contrasting colors.  Trace a hand on a piece of paper, staple 4 papers together (staples outside of the hand prints so you cut them off), and cut out 4 identical copies of the hand print.  

- Arrange the hand prints on the background papers, making sure to contrast each background and hand.  When satisfied, glue them on.

- Paint your hand black.  Make a print on each hand cut out.

-Arrange the 4 prints in a line or rectangle, and use tape on the back to join them together. 

I didn't invent a cooking project for Hh, and I'm not sure I've done one with my students.  (Insert surprised look here, I think I dropped the ball on this one!)  Not to worry, if you're enjoying cooking for each letter you may enjoy these no-cook horse cookies or these "hippo-tatoes".


For more letter h ideas, check out my letter h pinterest board too!  There are crafts for hippos, hedgehogs and hens, a variation on making your own chia pet for silly hair, mixing paint and bubbles to make gorgeous hydrangeas, blowing paint for hair, plus ideas for Hickory Dickory Dock and Humpty Dumpty!

I can't wait to see what you get up to this week!  Remember to tag me on Instagram @PaulaBeckerman2399 and FaceBook Paula's Primary Classroom if you post pictures, and if you're enjoying my ideas follow me too!

Have an awesome week everyone!

Wednesday, September 9, 2020

A cool collection of Cc activities

 Let's continue our letter Cc explorations! (If you missed the first installment, see it here.)

Activity #6 Castle and Sun collage creation.

Castle and Sun is a famous painting by Paul Klee (pronounced Clay) that I like to show the children during our letter Cc week.  The colors are bold, and it's made entirely of geometric shapes, so it's perfect to review squares, rectangles, triangles and circles.  What shapes can they see in the picture?  What does it look like to them?  Are there any doors or windows?  Turrets? (Use those great vocabulary words, you'll be amazed how many your children remember and use correctly!)

After we look at the picture, we build (construct!) castles with blocks, and I ask which part of their castles they build first.  Turns out you start at the bottom and work your way up - a concept I want them to think about BEFORE we make our paper collages.

 Check out all the geometric shapes in our blocks, just like we saw in Castle and Sun.  Hmm... what shapes do they see?

Finally I give the children a pile of squares, rectangles and triangles plus 1 circle (the sun), and they construct a collage from the bottom of the page up.  They already know the sun goes up in the sky, they're pretty smart you know!

If you and your child are practicing shapes, you might also like these hands on learning activities I've created.  This is Sorting and Drawing 2D Shapes:


 ...and this is Patterns with 2D Shapes


But wait, there's more! (Sesame Street wasn't the only TV I watched.)  Activity #7: Cat hats

Get ready for cuteness overload with this super simple cat hats!  I took a sheet of black construction paper and cut a long strip to go around each child's head.  (Pro tip, when you staple it, make sure the smooth side of the staple is on the inside against your child's head so it doesn't poke, scratch, or snag their hair).  We cut out and glued / stapled the nose and ears on, then crept around or crouched like cats.  Too cute! 


 Watch a quick how-to video here.

Activity #8 Painting with toy cars.

Paint or stamp pads + cars + paper = happy children.  It's easy, it's fun, why not?


Activity #9: Cow collage.  

The link above is to the French language site where this adorable cow idea came from.  You may think this multi-step art project will be too much for your littles, but the artistic ability of children has often amazed me!

Step 1: Children use crayons to draw flowers around the edge of their page.  It's important to use crayons because the next step is...

Step 2: Watercolor paint resist.  Children paint over the entire paper with one color of watercolor paint.  Look how the crayons resist the water, and it soaks into the paper around them, leaving the crayon pictures beautiful and bright!

Step 3: When the paper is dry, cut a rectangle from brown paper.  Have your child draw a smaller rectangle to cut out (the space between the cow's legs), then cut along the lines to make the cow.  From the little scrap rectangle they can make a tail.  Provide scraps of another color to make the rectangle nose and mouth (there are those shape words again!), plus horns and a tuft on the end of the tail.  They can add white circles for the eyes, and add the details for the face.  It's amazing to me that these were made by 3-5 year old children!  

I'd also love to see what YOUR child makes - if you post on social media, please tag me @paulabeckerman2399 or on FaceBook Paula's Primary Classroom.

 Activity #10 Songs!

We HAVE to have songs, right?  For Grandfather's Clock I like to tap rhythm sticks.  As they recite this rhyme children get to experience 3 different tempos for the music, and they're practicing self restraint to match my speed.  If you don't have rhythm sticks you can get the same effect with a couple of wooden spoons, or a pair of chopsticks.  Get creative!

 While you have your sticks (or improvised instruments) out, let's tap on our shoes for Cobbler Cobbler.  A cobbler is a job we don't see often any more, it's what we call someone who makes and fixes shoes.  We practice tapping to a rhythm, and the concepts of up and down in this fun rhyme:

Cobbler, cobbler, mend my shoe,  (tap on your shoes)

Have it done by half past two.

Stitch it up,  (tap sticks above your head)

Stitch it down,  (tap sticks on the floor)

Make the finest shoes in town.  (tap on your shoes)

Sneaking Cat Rhyme is one I found on Literary Hoots Cat Storytime.  Check it out, there are LOTS more fun cat rhymes and activities for cat loving children to enjoy!  It can be made even more fun by wearing the headband from activity #7.

 What other children's songs and rhymes can you think of for the letter Cc?  Let me know in the comments, and maybe I'll record them and add them to my YouTube channel for you!


Wednesday, September 2, 2020

The best activities for learning Bb

 Welcome to part 2 of letter Bb preschool activities you can do at home or at school!  In the last installment I talked about baking bread, going on a bear hunt, enjoying a teddy bears' picnic, and lots of fun backyard activities you and your child will love.  Let's explore even more ideas today!


Activity 1: Songs  

You had to know there would be songs!  You probably already know Take Me Out to the Ball Game, and if you do, you might even have a baseball bat and ball you and your littles can enjoy.  Here are two more letter Bb songs:

Beetles in the Basin in the Bathroom


Here is the Bee Hive


If you'd like to check out the counting clip cards and other early math activities with a bee theme, click here to see them in my TeachersPayTeachers store. 

Want more songs for Bb?  I have a Letter Bb playlist on my YouTube channel - click here to check it out!

Activity #2: This week's hand (and foot!) print ideas are a bumble bee, bear, and butterfly. Bea-u-ti-ful!


Last week some of you shared your hand print creations with me on Instagram 💗💗💗💗💗!  I would LOVE to see how you and your littles use any or all of these learning activities!  Please tag me @paulabeckerman2399, or leave comments on this blog - it absolutely makes my day!

Activity #3: Make binoculars

You'll need 2 paper tubes, a sheet of paper, a hole punch, and about 18' of yarn.

Start by measuring the length of your paper tubes, and cutting your sheet of paper to that width - keep all the length.  You'll have a long rectangle.  Tape or glue it to one of the paper tubes, carefully lining it up the ends of the tube and the paper.  Wrap it around both tubes, then tape or glue it in place.  (Remember, your little one can do the taping and gluing, only help with the parts they can't do well, and always let them do as much as they can!)

Use the hole punch (this part is probably too difficult for your child) to punch one hole on the outside of each tube.  Thread the yarn through and tie the ends so your child can put the binoculars around their neck.  It's fun to look through the binoculars to look for things that start with the letter B!


Activity #4  Butterfly paintings

You probably remember doing something like this when you were little: fold a paper in half, apply paint to one side, fold the paper shut, smush it, then open it again to find a symmetrical painting.  I recommend having plenty of paper on hand, because most children LOVE the magic of this simple activity.  


This is a great time to introduce the word symmetrical - being the same on both sides.  It's a great word, and once they start looking they'll notice LOTS of things are symmetrical: their face, many doors, lamps, the fireplace, the tv, the couch and more!  If they ask - and someone's child will ask - things that are not symmetrical are asymmetrical.  

Activity #5 Sensory play with a basket of beads / buttons / dry beans.

A lot of children really enjoy sensory play.  Just running your hands through a bowl of beads feels marvelous, and this is something our children don't get to enjoy often enough.  Sensory play can include water play, mud and sand play, soft animals, finger painting, smelling jars and much more - all staples of early childhood learning.  You can connect sensory play to letter learning by choosing materials that start with your focus letter, such as beads, buttons, or dry beans.  

Sensory play can get very messy - children are scientists who explore the world with wild abandon, and don't always keep materials in a container as parents and teachers might wish.  There are some easy ways to make sensory play a happier experience for both you and your child:

1. Know it will get messy to some degree, and put this kind of material out when you have the time and patience to deal with it. Stay close enough to supervise and redirect if your child starts throwing small pieces all over.  Make sure they know your expectations (Do you them to keep the materials in or near the container?  Do you expect them to help pick it up afterwards? Is there a time limit on how long you can keep it available?)

2. Place your sensory bin on a large towel or sheet, so when they're done most of the materials can easily be scooped back into the bin.

3. Consider taking water, sand and dry food materials outside to play, where clean up is easier.  I used to buy feed corn for our outside sensory bin, and whatever we didn't clean up, the squirrels would take care of.

4. Consider the ages and stages of your child(ren) and make sure materials won't be a choking hazard.

5. If the materials don't offer a way to play, your children will invent something - so put in a couple of scoops or bowls for them to fill, add some toys to hide and dig up, or add a favorite bath toy - the kind you pour water through - so they can pour materials through it.  Bored children WILL find a way to be entertained.


Activity #6: Letter Bb crafts

When I taught preschool one of our weekly activities was to cut out both the upper and lower case letter of the week, and to decorate them with things that represented the letter.  I had a copy of our alphabet letters posted along the top of the wall, and many of my students put their letters up on their bedroom walls and created their own alphabet wall at home.  These activities evolved over time, and your letters don't have to look like mine - there are many right ways of doing things in this world!  I'll share my ideas with you, but if there is something that is more meaningful to you and your child, do that instead.  I've taught a lot of children, and know a fair amount about early childhood education - but YOU know YOUR child best.

B is for butterfly.  You (or your child) can draw or cut out an upper case letter B from a piece of construction or printer paper.  Notice how the top and bottom half of the B are symmetrical?  Remember our symmetrical butterfly painting?  How could your child turn their B into a symmetrical butterfly?  We glued on shapes, and I guided children to find 2 of each shape, and to place one on the top and one on the bottom of the B.  A pipe cleaner bent in half, with the ends curled around my fingers make simple antennas, which we stapled on.  If your child wants to add a couple of wiggly eyes, or long thin oval to represent the butterfly's body, go for it!

b is for bat and ball.  When I was in kindergarten Mrs. Potts taught us "first the bat and then the ball for b" - and it stuck with me.  I could tell the difference between b and d because d was "first the dog and then its tail". Thank you to Mrs. Potts, my students made their letter b crafts with a paper baseball bat and paper baseball, and I printed the words on it so they and their parents would remember.  

If your child is starting to pay attention to letters, and enjoys coloring, you may like this FREE activity to practice Bb, Cc and Dd.  Please follow their lead on what is enjoyable - the most important thing they're learning in preschool and kindergarten is that learning is FUN!  We're setting the stage for their attitude towards school for the rest of their life - that's a big responsibility!  If they don't want to color or do worksheets, please don't make them.


Most of the resources I make for preschool and early kindergarten are games.  If you want more play based learning activities, I'd love for you to check out my resources on TeachersPayTeachers - and no, you don't have to be a school teacher to use the site, parents are teachers too!  

Thank you for reading all the way through.  I really would love to know how you're using these ideas!  Let me know in the comments, or tag me on Instagram: @PaulaBeckerman2399 .  See you next week for the letter Cc!


Sunday, January 1, 2017

Painting on Ice

Painting on Ice, from Paula's Preschool and Kindergarten
 If you live in the northern hemisphere, you may well be looking out on wintery scenes like these:
Painting on Ice, from Paula's Preschool and Kindergarten

Painting on Ice, from Paula's Preschool and Kindergarten
Beautiful, yes, but also very cold.  You and your students may well spend more time indoors during the winter, but that doesn't mean you can't explore the ice and snow!

Scoop some up, add some droppers of warm water and some more of cold paint, and let the kids explore.  It's a fine motor work out, and absolutely fascinating!
Painting on Ice, from Paula's Preschool and Kindergarten
Your students might learn about changing states of matter as they add drops of warm water to the ice. 
Painting on Ice, from Paula's Preschool and Kindergarten
Where does all that paint go when you drip it in?
Painting on Ice, from Paula's Preschool and Kindergarten
Is it underneath the ice?
Painting on Ice, from Paula's Preschool and Kindergarten
That stuff sure is cold on our fingers!
Painting on Ice, from Paula's Preschool and Kindergarten
It's a lot of fun to drip paint into the ice!
Painting on Ice, from Paula's Preschool and Kindergarten
And to add more, and more!
Painting on Ice, from Paula's Preschool and Kindergarten
Quite beautiful really!
Painting on Ice, from Paula's Preschool and Kindergarten
It's amazing how long this fun can last - maybe even after parents and siblings arrive for pick up, because they may want to join in too.
Painting on Ice, from Paula's Preschool and Kindergarten

P.S.
If you're looking for more ways to learn about winter, check out my most recent resource:
https://www.teacherspayteachers.com/Product/Snow-STEAM-Investigations-2947861
Thanks for stopping by!
Paula

Sunday, December 11, 2016

Stacked Stars Christmas Trees

 
Christmas is sneaking up on us, and you're probably planning the Christmas art projects you want to get to with your students - and some kind of year end celebration, report cards, shopping and cleaning and wrapping for your own family, juggling staff meetings and... you're probably short on time and energy, even if you have visions of meaningful lessons and carefully crafted learning activities.  If you have everything under control, please share your tips!  For the rest of us, I thought I'd share another simple holiday activity that takes almost no preparation.

As is so often the case, I found my inspiration via Pinterest.com.  Unfortunately, the pin doesn't go to the correct page on the blog, and it is in French... but here's the pin to show the idea.

To make this adorable stacked star Christmas tree you'll need some light card (I used manila folders), star shapes in several sizes, paint, beads, one pipe cleaner per child, and doodads to decorate with.  We used sequins, but use what you have on hand.  It's also helpful to have small pieces of styrofoam to use as a base for your trees, but florist foam would be another option.

On the first day (it's a 2 day project) the children painted their stars, and we let them dry.  Later I cut the stars out - my kiddos were 3-5 years old, and I guess I wanted the finished product to look a little more polished than it would with 3 year olds doing the cutting.  If you have the time and patience, and your children have the skill, let them cut them out.

To assemble our stacked star trees, we first put one bead in the center of a pipe cleaner, and folded the pipe cleaner over.  Twist the ends together a little, to make one strong supporting "tree trunk".  Make tiny holes in the center of each star, and have the children order the stars by size, from smallest to largest.

Next the children will alternate threading on the stars (from smallest to largest) and 3 beads - the beads separate the layers of stars and give height to the trees.  When all the stars and beads are on, stick the remaining end of the pipe cleaner into the styrofoam or florist foam base.  Have the children decorate their trees with sequins, pompons, or other shiny bits and bobs, then proudly display them until it's time to send them home!

Ta-da! 

 If you're also looking for some help putting Christmas learning centers together, please stop by my TeachersPayTeachers store and see some of my other holiday activities!

Sunday, October 30, 2016

Helping Children Find their Calm


From now until Valentines Day seems to be a completely, utterly, exhaustingly, exciting time for our children.  There's Halloween, Thanksgiving, Hanukkah, Christmas, New Year, Chinese New Year, and Valentines Day to start - and still more holidays and celebrations, depending upon your cultural background.  Holidays and celebrations so often revolve around families and friends gathering together, and when people gather, there's usually food.  Yummy, amazing, celebratory feasts, full of delicious things!  There's also a lot of excitement, lots of build up to each holiday, to having or being guests, to giving and receiving, preparing your home, and to recovering between holidays.  Are you exhausted just thinking about it, or excited with anticipation?

Our kiddos often seem to get "wired" this time of year, so wound up with excitement and anticipation that it's hard for them to slow down, calm down, wind down, find their focus.  If you are nodding your head, and thinking of a couple (or more) children who are really struggling with this, then this post is for you!
Helping children find their calm
With almost 25 years experience teaching early childhood, I've been through this holiday cycle a few times, and have found a few methods that have consistently worked to calm my students.  Here are some of my favorites.

Sing together.  Sure, you'll start out with the super exciting holiday songs the kiddos want, but there are only so many times you can sing Over the River and Through the Woods, Frosty the Snowman, or the Dreidle Song.  When the kiddos run out of holiday songs, or you run out of energy, it's time to tame the wildness in our children by singing something calmer and soothing.  If your students are young enough, try some nursery rhymes - it's difficult to bounce off the walls while singing Twinkle Twinkle!  The slower cadence of the music will help the children slow down too.

Are your kids too old for nursery rhymes?  How about songs made into books, such as When You Wish Upon A Star, Puff the Magic Dragon, Love Me Tender, or A You're Adorable?  (No, I'm not affiliated, just sharing links in case you are interested.)  Don't know the tune, or feel comfortable leading the song?  Try books on CD or look on Youtube.com!

Another lovely way to harness the power of music as you calm your kiddos is to play gentle music as they paint, or do an art project.  I love Eric Carle's I See A Song.  Most of the pages have no words, only pictures, and the book on tape (yeah, I'm old) is a great accompaniment to an art project.  There doesn't have to be a predetermined outcome for the painting/drawing either, this is great as an open ended activity, the part you are planning and working for is the calm that naturally comes with the art and music.

For many years I had a fish tank in my classroom, and still later someone gave me a plastic tank with plastic fish.  When it was turned on a light came on and a motor swirled the water, so the fish "swam" in the tank.  Both the real and the pretend tank were great for calming my class.  I would turn on the light in the tank,  have the children sit quietly where they could see it, and then turned off the classroom lights for 5 minutes.  We would just sit and watch the fish, and breathe.  Added bonus - I got to just breathe too!

Another suggestion is to read either Chipmunk Song or The Snail's Spell, both by Joanne Ryder and illustrated by Lynne Cherry.  In both books, the author has the children pretend to transform into the animal in the title, and she gently takes them through what it might be like to be that creature.  I always have my kiddos spread out on the rug, because they'll need space as they act out the story, and I set ground rules before we begin: they have to stay on the floor (no standing up), be careful not to hurt each other, and to be quiet so they can all hear the story.  Every group of kiddos I've ever done this with has ended the stories feeling much calmer than they began them!

My final suggestion sounds counter-intuitive at first: take them outside for some unstructured play time.   Yes, they'll probably run hard and play hard - that is, after all, what children are wired to do!  While at first they'll appear to be even more excited and energized, the great news is that by releasing that energy, they'll actually be much more likely to be able to contain themselves and to focus on your lessons afterwards.  The boys in the photo above are both high energy kiddos - but after letting off steam, they found a few quiet moments to just gaze at the creek.

I know there must be many, many other ways of helping kiddos calm down, and I suspect we are all going to need a few ideas over the coming months.  I'd really love to know what works for you - share your thoughts in the comments below.

Happy holidays,
Paula

Saturday, May 7, 2016

Don't Let the Pigeon run Story Time!

Don't let the Pigeon run Story Time - ideas for extending the Mo Willems books.
Guess who showed up to story time this week?!  Hot dog, Duckling friend, buses and all.  Pigeon!
Don't let the Pigeon run Story Time - ideas for extending the Mo Willems books.

Don't let the Pigeon run Story Time - ideas for extending the Mo Willems books.
Sometimes Pigeon is a little.... shall we say... insistent.  Apparently that is HIS hotdog!  Fortunately for Duckling, Pigeon did eventually agree to share the hotdog.

Our friends painted Pigeon handprints.
Don't let the Pigeon run Story Time - ideas for extending the Mo Willems books.
 They counted stars on buses (no Pigeons were permitted to drive)!
Don't let the Pigeon run Story Time - ideas for extending the Mo Willems books.
They even pretended to help him take a bath.  We were planning real water and washcloths outside, but the weather was a bit too cold for it, so we had nice warm bath play inside.
Don't let the Pigeon run Story Time - ideas for extending the Mo Willems books.

We did venture outside for a few minutes to release our lovely butterflies.
Over the last 3 story times we've watched them grow from tiny caterpillars, to cocoons, to butterflies.
Don't let the Pigeon run Story Time - ideas for extending the Mo Willems books.
What an amazing metamorphosis!  Today it was time to release them.  The breeze seemed to excite our butterfly friends, but none of them ventured out of their net home until Ms. Debbie and I gently guided them out.  This one hung around behind the others, and everyone had a chance to see it up close.
Don't let the Pigeon run Story Time - ideas for extending the Mo Willems books.
It's just as well the Pigeon was inside doing fun activities, and not bothering these beauties!