Christmas is sneaking up on us, and you're probably planning the Christmas art projects you want to get to with your students - and some kind of year end celebration, report cards, shopping and cleaning and wrapping for your own family, juggling staff meetings and... you're probably short on time and energy, even if you have visions of meaningful lessons and carefully crafted learning activities. If you have everything under control, please share your tips! For the rest of us, I thought I'd share another simple holiday activity that takes almost no preparation.
As is so often the case, I found my inspiration via Pinterest.com. Unfortunately, the pin doesn't go to the correct page on the blog, and it is in French... but here's the pin to show the idea.
To make this adorable stacked star Christmas tree you'll need some light card (I used manila folders), star shapes in several sizes, paint, beads, one pipe cleaner per child, and doodads to decorate with. We used sequins, but use what you have on hand. It's also helpful to have small pieces of styrofoam to use as a base for your trees, but florist foam would be another option.
On the first day (it's a 2 day project) the children painted their stars, and we let them dry. Later I cut the stars out - my kiddos were 3-5 years old, and I guess I wanted the finished product to look a little more polished than it would with 3 year olds doing the cutting. If you have the time and patience, and your children have the skill, let them cut them out.
To assemble our stacked star trees, we first put one bead in the center of a pipe cleaner, and folded the pipe cleaner over. Twist the ends together a little, to make one strong supporting "tree trunk". Make tiny holes in the center of each star, and have the children order the stars by size, from smallest to largest.
Next the children will alternate threading on the stars (from smallest to largest) and 3 beads - the beads separate the layers of stars and give height to the trees. When all the stars and beads are on, stick the remaining end of the pipe cleaner into the styrofoam or florist foam base. Have the children decorate their trees with sequins, pompons, or other shiny bits and bobs, then proudly display them until it's time to send them home!
Ta-da!
If you're also looking for some help putting Christmas learning centers together, please stop by my TeachersPayTeachers store and see some of my other holiday activities!
I love teaching and learning with young children, this is where I share my ideas.
Welcome to Paula's Primary Classroom! This blog is where I share ideas for teaching and learning with families, friends and other early childhood educators. Please don't use the photos or text of this blog without permission, but please do use any ideas you find useful. Thank you for stopping by!
Showing posts with label ornaments. Show all posts
Showing posts with label ornaments. Show all posts
Sunday, December 11, 2016
Sunday, December 4, 2016
Rocking December with Rudolph
I love teaching the letters R and S in December - between Rudolph and Santa, there's plenty of awesome activities, books and crafts, and the children are so eager to do them all! Today I thought I'd share just a few of our favorite Rudolph activities, besides reading the Classic book by Robert May and singing the Christmas carol that almost everyone knows.
Another fun song for the preschool and kindergarten crowd is a variation on Head and Shoulders: Hooves, Belly, Antlers, Nose. I found an adorable video of children singing it here, your kiddos will quickly make it their own! I like to add a red sticky dot to the children's noses when we sing this one - and it makes a really cute picture for their families!
You've probably seen the painted hand print reindeer included in my photo above, I recently found a version via pinterest that also included Santa in his sleigh - that's one to try this year! While some children aren't eager to have their hands or feet painted, I've found that most do warm up to the idea, and then enjoy the tickly sensation of the wet paint brush on their hands. It's a fun sensory experience, and a quick one on one time with a teacher - hand prints are one of our favorites!
I've also made the construction paper hand and foot print reindeers for... well, for ever! I began making these with my preschoolers when my own children were tiny, and each year I still bring out these treasured ornaments - we have a slew of them, one for each year that the boys would still go for it, showing their hands and feet growing incrementally year after year. These make fantastic gifts for parents, and trust me, even if they have had one every year since their children were born, they'll be thrilled to have another! (Teacher tip: trace the children's hands a day or two before you want the children to assemble the reindeer, so you can cut them out. Nap time is a great time to sit and prep for this!)
I wish I could claim the Surprised Rudolph idea as my own, but the idea came from a faithful attempt. She in turn found her inspiration on Artsonia.com. Have you met Artsonia yet? Check out our school gallery, then look around at all the other amazing lesson plans that are there to inspire you! This cute project not only looks adorable, but gives the children a lot of fine motor practice with scissors
and glue,
plus tracing around a circle shape, and talking about squares, triangles, rectangles and positional words.
That's a lot of learning for a holiday decoration!
Let me know if you have some other fun reindeer activities to share - I'm always on the look out for more fun learning ideas!
Sunday, December 29, 2013
S is for Santa, of course!
 Several
years ago I bought a large kid sized red fleece top, and red pants. I
added white fleece around the cuffs and hems, added an old black belt, a
fun fur beard, Santa hat, and my own black snow boots, and voila! We
have a Santa costume.
Several
years ago I bought a large kid sized red fleece top, and red pants. I
added white fleece around the cuffs and hems, added an old black belt, a
fun fur beard, Santa hat, and my own black snow boots, and voila! We
have a Santa costume.We also worked hard on more ornaments for our parents this week, in preparation for our class Christmas party. I love the snowmen CDs, which I found on happyhooligans.ca from November 29, 2013. I painted old CDs with white acrylic paint ahead of time, and the children added button eyes, black bean mouths, and a twisted square of orange tissue paper for the noses. Super cute! The only difficulty was that when I stacked the CDs, some of them stuck together. Next time I'll put a piece of wax paper between them.
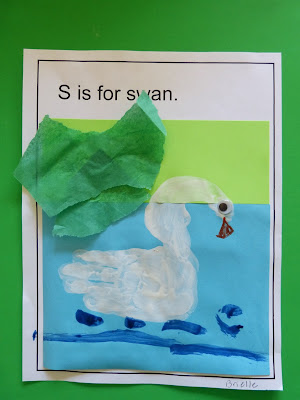
Here are our hand print choices for this week: Santa, swans, and snails. You can see all our hand and foot print art ideas on my handprint alphabet pinterest board.
We had some beautiful days this week, and took advantage of it to get lots of outside time. The kiddos were so adorable, here are some of their favorite outside play choices:
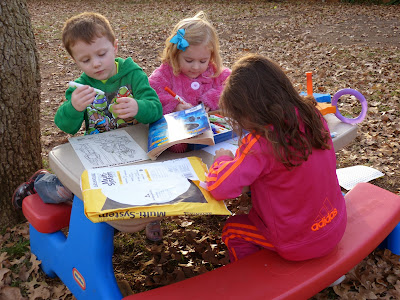
Drawing, coloring and writing at our outside table...
Playing on the swings. Swinging on their tummies is ever popular, and since every child I've met wants to do it, it must feed some kind of a need. These two were super cute holding hands and swinging side to side together!
Running, chasing, playing...
The kiddos were fascinated by the jack-o-lantern pumpkins rotting in the dormant veggie garden. I watched them run up and poke at them, to see how soft they had become, and realized this one was ready to split open. I didn't want it to eventually mush under anyone's prodding, so I poked a hole in it, and opened it up for the kids to see. Everyone wanted to look, and I had to ask them to not pick out the seeds from the rotting pumpkin!
Do you wonder what secrets these two are sharing? So sweet!
Then came the biggest event for the week, our Christmas party, complete with a visit from a certain jolly old guy!
Several times a day for the last two weeks, I've read the children one of my books of The Night Before Christmas. Every time, I make the same hand motions for the kiddos, and they have all memorized most or all of the poem! We start our Christmas party each year by reciting it to our parents. Needless to say, the children who have been with me for several holiday seasons know it really well! Our moms and dads were very impressed!
Before our party, we talked about gift etiquette; looking at the giver, saying thank you, and making a positive comment about the gift - even if it is just to notice the color or to acknowledge the thought behind the gift. So often our kiddos are overwhelmed with gifts, and tear through them. Taking the time to be appreciative is important!
Julie and I give each child a small gift to keep. This year the kiddos got a small stuffed animal.
The second gift the children open is something to stay at school for us all to enjoy. We got new books, some puzzles, and stuffed animals!
Do you remember being a child? One thing I remember is my love of paper, any kind of paper! After we had opened our gifts, we gathered up the paper to save for crafts the next day. Used fancy wrapping paper with snowmen and shiny sparkles is "trash" to most adults, but to the children, it is treasure! They cut it, pasted on it, and decorated it like crazy the day after our party!
Our gifts to our parents is all the ornaments we've made. I treasure the Rudolph ornaments my boys made with their hand and foot prints when they were small, the popsicle stick snowmen, and paper gingerbread men... I hope our parents all find these as precious as I do!
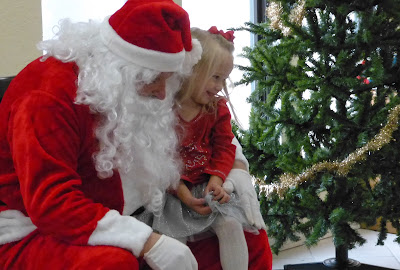
Then Santa came to see us! A few of the children weren't too sure about him, but most were thrilled to have him visit.
As you can see, the children were very engaged with this project! (Gee, candy, sugar cones, and a craft project all in one, wonder what attracted them?)
Happy Holidays! I hope your Christmas, or whatever holiday you celebrate, is as sweet as can be!
Saturday, December 7, 2013
Pete The Cat Saves Christmas ornament
I just finished creating a new ornament for my pre-k and kindergarten students, and want to share it!
Like so many other people, my kiddos and I LOVE Pete the Cat. One of our stories this week is Pete the Cat Saves Christmas, by Eric Litwin and James Dean. I wanted a follow up activity for my students, so I drew Pete the Cat on card stock, and painted him. The trim on Pete's hat is made of fleece, and I used a touch of fleece to make a pompon for his Santa hat. Black sharpie for the eyes and whiskers finishes Pete off.
My kiddos will be painting Pete later this week. I can't wait to see a dozen Petes on our class Christmas tree! (Sneak peek, they loved this!)
Thursday, December 5, 2013
A Tree Full of Love
I have a friend whose Christmas tree is worthy of Rockefeller Center or Better Homes and Gardens. All her ornaments are color coordinated, her tree a perfect theme of gold and white, glowing with lights. It is a beautiful tree.
My Christmas tree looks like the fallout from an explosion at a craft store. There are salt dough ornaments, adorned pine cones, fading construction paper, and snowmen made from plastic spoons. I have felt, buttons, beads and decorated clay pots, and a good supply of glitter. I may have the only cardboard and felt hamster in existence, and it is patiently waiting for Santa in my Christmas tree.
What I have is a tree filled almost to the brim with love. There are ornaments commemorating a lot of special occasions, things my children created, and gifts from family and friends. As I put each ornament out, I remember the people who gave them to me, or the reason I bought them. I think of the stories behind the ornaments, and I have to admit, sometimes I tear up. I count these ornaments amongst my most precious possessions, each one a vessel for memories. Today I want to share the stories of some of the ornaments my students have given me over the last 20 Christmases.
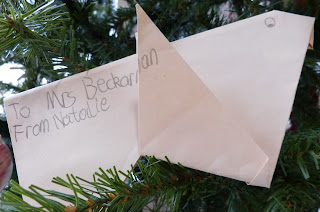
Seventeen years ago, I read Alan Say's touching story, Tree of Cranes, to my first grade class, and then taught them how to fold a simple origami bird with a small square of Christmas wrap. Later that day, Natalie, Michelle and Rachael each made me an origami bird from manilla paper. These birds remind me of both the sweet girls who made them, and Say's book, and it is fitting that they spend each December perched together, deep within my Christmas tree.
Another year, Bree made me the clay pot ornament you see above. In my thank you note, I wrote that I would put it on my tree every year, and think of her when I did. How incredibly true that is, for that night she made me 6 paper angels too. Such a sweet gesture, and I relive it each December.
Some of these gifts of love came from a store, presented in a fancy cardboard box with a photo of the ornament on the outside. On most, I wrote the name of the child who gave it to me, and each year, those ornaments go back into their boxes, and I remember the kiddos as they were, so long ago.
Love doesn't always come in fancy packaging. The next ornament came from Keith, who was in my very first first-grade class. He brought it to me the year he was in third grade. He remembered me! He still wanted me to know he was thinking of me. Is there any gift more precious?
There are ornaments from Brian, and Avery, Alex and Aaron, Hadley and Tina, Ella and Hailey. Many more, from Colin, Paige, Travis, Will, Lauren, Noah, Tiernan, Danny, Grant, Ana, Ella, T.J., James and some whose names I can no longer recall.
My tree may not look perfect, but it is filled almost to the brim with love. As you enjoy this holiday season, which ever holiday you celebrate, I hope you both give and receive gifts of kindness, thoughtfulness and love, whatever form they may take.
Happy Holidays!
Subscribe to:
Posts (Atom)


