Welcome to Paula's Primary Classroom! This blog is where I share ideas for teaching and learning with families, friends and other early childhood educators. Please don't use the photos or text of this blog without permission, but please do use any ideas you find useful. Thank you for stopping by!
Showing posts with label learning letters. Show all posts

Sunday, December 6, 2020

Letter S is Stunning in the Spotlight

 It's stunning, it's super, it's spectacular, it's...

...the letter Ss!  Timed just right for December and Santa, S is a smash hit every year!

It's all too obvious, but S for Santa really is a favorite.  With plenty of Christmas and Santa crafts and activities available, it's easy to find some that appeal to you and your students.  Many people schedule a visit with or to the jolly old elf, and we're no exception, but that's not your only option!

My big event to start our letter Ss week is to have the children dress up and pretend to be Santa.  I didn't go buy an expensive Santa costume - you can put one together pretty easily with just a little creativity!  For my costume I found a larger kids shirt and elastic waist pants at a resale store.  I sewed on some white fleece around the arms, bottom of the shirt and pant legs, added my own snow boots and black belt, a cheap Santa hat.... but what to do about a beard?  I found a piece of white fake fur, and just tucked it into the hat!  Ta-da!  Lots of little Santas!  Each child had a turn to put on the costume for a photo, which we put in our alphabet photo albums.  While we were taking turns putting on the costume we sang holiday songs - you could also add ringing bells in time with the music to keep little hands happily occupied while waiting for a turn.

We also make hand print Santas, which we print onto our large letter S craft.  You'll need red, white, and skin toned paint.  If you look at the Santa print in the picture above, you can see the center of the palm is Santas face, the fingers and around the edge of the hand is white for hair, and the thumb and face of the hand is his red hat.  It's easy, fun, and painting little hands is a lovely sensory experience and an opportunity to talk about the cool, slippery paint, the tickly sensation, and to introduce great vocabulary words about the experience!

You know I like to offer the children options for their hand prints - for one thing, not everyone celebrates Christmas and Santa, and another reason is that children so seldom have a say in things that having a choice helps them feel powerful - and more likely to cooperate when I can't give them choices.  

One of the other options is to paint snails - and this one isn't so easy to look at and understand, so I'll explain.  The brown part of our snails is made by painting the curved outer edge of our hands, from the tip of the pinky finger down to the fleshy part by our wrists.  We use a second color to paint the same area but with our hands fisted, and that sort of circular fist print makes the snail's shell.  When it's dry the children can use markers to add the swirl in the shell and stems for wiggle eyes.  (If you haven't taken a close look at a snail with your child, this is an excellent time to do so, so they know what they're trying to draw!)

Our other hand print option is to make a swan.  For this one we created the background first - blue for a pond, green for the plants surrounding it.  I like to offer the children tissue paper to add details - it's very inexpensive (I save it after gift giving occasions), and is fun and easy to tear.  Tearing is a great fine motor workout, so we're developing little fingers with a recycled material while encouraging artistic expression and learning our letters.... is that a win-win-win-win? Why yes it is!  Once our background is complete we make a white hand print for the swan's body and neck, then the children add a little more neck and a head.  As always, we add final details when the paint is dry.

To continue the Christmas theme learning, I created a Christmas patterning center.  With 4 AB, 4 ABC and 4 AAB / ABB patterns to continue, there's something just right for each child.  I seldom use worksheets with preschool children, but for those who do, and for slightly older children, I included 15 differentiated cut and paste activities. It's a fun way to bring some math to our seasonal learning!


If you do letter Ss in December, or at least during the winter, you may have another easily available, free, fun material on hand - SNOW!

Of course you're going to spend time outside in it, but there are also going to be inside times you want to make engaging, and painting on snow is a HUGE hit!  We simply filled pie pans with snow, then let the children use droppers to add water color paints to their tray of snow.  It's awesome to see how the color quickly leaches down through the snow, leaving a lightly colored area where the paint was.  This is a fun time to practice mixing colors - because your children are going to do it anyway!  If you offer primary colors (red, blue, yellow) someone will notice the combinations that result in secondary colors (purple, orange, green).  If not, you can act surprised to find green snow when you didn't offer green paint, and ask the child(ren) how they made it.  They'll figure it out and proudly tell you all about it!

Be prepared for this activity to last much longer than you think it will.  Also be prepared for large puddles of paint water - have old towels on hand ready for the inevitable cleanup.  The first time I offered this activity it lasted 2 hours, and older siblings who were arriving with parents at pick-up time joined in and stayed to play.  Thank goodness there's plenty more snow outside and you can easily refresh their snow over and over again!

If your little ones are super excited about snow, and want to know more, check out this snowy learning packet!

The non-fiction booklet explains how snow forms - at a level little ones can understand.  It's fun to graph their favorite snowy activities, and to measure with snowflakes.  Our favorite is probably using pattern blocks to create symmetrical snow like creations.  These are all easy ways to tie in science and math learning along with our letter study!

I haven't talked about our lowercase S at all yet!  S looks like a snake to me, so I like to read a book about a snake (my go-to is Keith Baker's Hide and Snake), then we make our own snakes.  The snake in the book we read has lovely patterns on it, so it's a natural step for the children to make patterns on their snakes too!  We do this with colorful foam shapes - and I have an important tip to make this go smoothly: have the child choose 2 or 3 shapes ahead of time, and find multiples pieces of each.  If they want small yellow triangles and big pink circles, they should find at least 5-8 of each BEFORE the glue comes out.  Put all the other shapes away out of sight.  It's so very hard to make a pattern when there are a kazillion brightly colored pretty shapes in front of you - who can choose?!  Trust me on this one, I did this craft with groups of children for about 15 years... and have learned from the children.  :-)  Once you have just the needed pieces in front of you, get out the glue, and help your little one say the pattern outloud, pausing expectantly at the end so they'll fill in the next shape: "Red, blue, red, blue, red...?"

As I said before, not everyone celebrates Christmas, and even if all of your students do, it's important to include other cultures and ways of doing things, because in our great big world there are many right ways of doing things!  December is the season for Bodhi Day, Hannukah, Kwanza, Omisoka (New Year's Eve), Boxing Day, winter soltice, Yalda and more!  Both Bodhi Day (December 8) and Hannukah (sunset December 10 - 18) will be celebrated this coming week.

To my friends who are celebrating - Happy Hannukah, and blessed Bodhi Day. 

Much love,

Paula


Sunday, November 29, 2020

Rocking with Rudolph is Really Remarkable

It's almost December, so we're going to skip ahead a few letters - because rocking December with Rudolph really is remarkable!

Have you sung the reindeer version of Head, Shoulders, Knees and Toes: Hooves, Belly, Antlers, Nose ?

It's so much fun!

 There's also our Rudolph hand print, inspired by HandprintCreations.com and funhandprintartblog.com.  I found the robin idea at creatingreallyawesomefunthings.com , the rocket at CraftyCrafted, and I think I came up with the raccoon myself... but it's been a long time, and it's so hard to remember!  There are also other reindeer hand prints on my handprint Pinterest board if you want to check them out.

The Rudolph hand and foot print ornament included below is one of my all time favorite preschool Christmas crafts!

 I did this every year when my children were little, and have a progression of Rudolphs, slightly bigger each year as the children's hands and feet grew.  Please please, when you do these crafts make sure you put your child's name and the year on the back, I promise you'll treasure them all the more for it!


 The fun What's Up Rudolph? craft was inspired by this one on Artsonia.  If you haven't visited Artsonia yet, why not?!  It's a free site, full of wonderful art ideas for children of all ages, and it allows teachers to safely upload children's art into an online gallery.  Parents can even order merchandise with their child's artwork on it!

For this project the children cut out rectangles, triangles and circles, then assembled their projects.  It was a great fine motor / scissor skill activity, and they were thrilled that the results look so lovely!

Our letter R craft also incorporates Rudolph the red nosed reindeer, because the children absolutely remember the sound to associate with the letter this way!

Finally, I wrote a short song about the names of all the reindeer! You can see it on YouTube,

or click here for the printable booklet.

That's it for this week - I hope you and your little ones have lots of fun, and I'll be back next time with S is for Santa.


Sunday, November 22, 2020

Nine things you need to know about N

Number 1: Nutcrackers

Since I'm writing this post in late November, it's a great time to think about holiday decorations and activities, and nutcrackers come to mind!  The nutcracker art project I'm showing here was all about cutting and pasting and shapes.  As you can see we've used a variety of rectangles and some circles to create our nutcrackers, and then decorated them with markers.  One of the lovely things about doing this project in my preschool was that the children could do it 2 or 3 years in a row, with different results that showed off their improved scissor and drawing skills.


Number 2: Names!

Learning their name is a big deal for a child - being able to identify it, read it, and write the letters is something that takes a long time, but since their name is THE most important word in the whole world, it never gets old!  For our snowmen names we cut out circles (one for each letter plus one for the head) and glued them down, wrote one letter on each circle, and decorated the snowman.  We did a similar project with green triangles that stacked to make a Christmas tree - but you could also practice writing it with different pens, pencils and markers, stamp it, find the letters on a cereal box, etc, the possibilities are endless!

Number 3 and 4: Nests and Narwhals

Yes, I really did teach the kiddos about narwhals.  It's easy to find a short video on YouTube about them, and then to talk about how awesome they are!  The hand prints were inspired by these from Red Ted Art - she has SO many awesome ideas, you should definitely check out her blog!

The first nest was inspired by this one from Crystal and Co. but I later modified it by printing the side of a hand from the tip of the pinkie finger to the wrist, and I think it looks more nest like this way.

Number 5: Nuts

Clearly this isn't a good activity if you have a child with nut allergies.  For those of you who can use nuts in the classroom, I found a bag of mixed nuts in the shell one December, used it for sensory play for a while, then later was still able to shell and eat the nuts.  This was one of my first sensory bins to put together, and because the nut shells felt very wood-y, I included other wood like craft supplies: clothes pins, corks and popsicle sticks.  They started out all sorted in small boxes (as you can see) and were used in various ways.  I initially put them out with cardboard tubes, and the children slid them down, discovering that the nuts rolled and the sticks and clothes pins just slid down.  Unfortunately some of the children decided the cardboard tubes made good arm cannons, so I decided to cut holes in a box and secure the tubes in the box for more purposeful play. (Yes, that's Paula talk for let's not pretend to kill each other.)  Sometimes we dumped the nuts down the tubes, sometimes we sorted, sometimes they ended up in the toy farm. Overall it was a good introduction to sensory bins for both me and the children, as we all learned something.


Number 6: Numbers

Sure, your child can count to 10, or maybe 20, isn't that everything they need to know about numbers?  Well, no.  Once children have the counting sequence memorized it's time to start counting objects.  Can they point to one object as they say each number?  Do they know to stop counting when they run out of objects to count?  Can they read the numbers and show you the correct number of fingers (apples, erasers, legos, etc.) to match the numeral?  This Christmas themed counting activity covers numerals and number words up to 20, and is a fun way to practice numbers. 

As they get a little bigger, you'll want your children to learn your phone number.  I've found that chanting it together regularly makes it so much easier to remember!  When my boys were little we'd recite our address and phone number every time we pulled into the driveway, and they had it memorized just in time for us to move to a new address. (You win some, you lose some)!


Number 7: Letter Nn crafts, of course!

For the uppercase letter N, I put out number stickers and challenged the children to put them on their letter in number order. The lowercase n was on either black paper, and decorated with stars to represent the night sky.


Number 8: Noise

The good news is, you don't even have to plan for this activity, chances are that your little one(s) will make plenty of noise anyway!  This is a good week to provide musical instruments (outside is really best) or to have your child make their own noise makers.  Not into noise?  Substitute in Nature - there is always something to explore and discover outside!


Number 9: Nine little reindeer song

I wrote this counting rhyme several years ago, perhaps your littles will enjoy singing it with me!

That's it for this week!  See you next time for the letter Oo.  Until then, have a lovely week, a delicious Thanksgiving, and stay safe!  

Paula

Sunday, November 1, 2020

Kicking it with Kk

 Yes, we're really kicking it with Kk! Karate kicking that is, because it's a memorable way to introduce the letter!

There are actually a surprising number of words starting with Kk that the kiddos can relate to, and that make a great starting point for learning.  Let's talk about some of them!

Kittens (and puppies) in a kennel.  I found an adorable pink fabric kennel at a yard sale, and of course we filled it with all the kittens and puppies we could find!

Kebabs - we made fruit kebabs, but if you're learning at home you could make a whole meal of it!  Yum!  Remember that we all learn best by doing, so try to find (safe) ways for your child to help.  Can they cut the fruit or veggies that are going on the kebab?  I used plastic drink stirrers for ours so the children could safely put food on and take it off.  Get creative!

Komodo dragons, kookaburras, koalas and kangaroos - can you take a field trip to the zoo to see any animals that start with K?  Can you visit a Japanese Garden with a koi pond?  Or head to a grocery store looking for kiwi fruit?


We found a koi pond at the zoo, and bought fish food so we could feed them.  There's something very calming about just watching them - and who couldn't use a few moments of calm?  

If you want to follow up by painting the koi, take some photos and also talk about the colors of the koi.  They're usually shades of yellow, orange, red, black, white and grey.  Talk about how their bodies curve, notice the fins sticking out, and the eyes you can just barely see on the sides of their heads - all the features your child will get to draw for themselves.  I used this wonderful step by step tutorial, and was amazed at the gorgeous art work even 3 and 4 year old children can create!

For some fun math learning,  I created this counting and addition resource full of koalas, kangaroos, kookaburras and lots of other Australian animals.  The count and clip cards are a sneaky way to get in some fine motor practice (opening the pegs), and the counting and addition mats support young math learners by making the math concrete (rather than just an abstract concept).  You can find it in my TeachersPayTeaches store if you'd like it!


Candy doesn't start with K, but KitKat and kisses do, and you KNOW those will get your child's attention!  I like to hide a mini KitKat or chocolate kiss in the toy kitchen for each child to find, and to keep the wrapper to go on our letter Kk pages.

Of course, you know we have to make hand or foot print art!  Here are our kingfishers and koalas!

To make the kingfisher you'll need to paint your child's foot half blue and half orange.  When it's dry they can add a torn paper branch, wiggle eyes, a skinny triangle beak, and little bird feet.

To make the koala have your child glue a paper tree along the side of the page, and a branch coming off it near the bottom of the page.  Paint their hand grey, and print it in the crook of the branch, with the fingers printing onto the tree to look like the koalas legs holding on.  They can add a head and ears, and when it's dry add features and torn paper "leaves" in the tree.  Too cute!

I have to admit, I'm really quite pleased with the letter Kk crafts that I came up with - they both have movable pieces!  

The joey kangaroo can be slipped in and out of the mother's pouch, which goes well with the song I made up to teach the kiddos about kangaroos (text below).  The lower case k is a king (it has a crown), knows karate (check out the belt) AND it kicks! Check it out in this quick video:


The Kangaroo Song by Paula Beckerman, 

(to the tune of The Wheels on the Bus)

The kangaroo hops up and down, up and down, up and down,

The kangaroo hops up and down, all around Australia.

The baby kangaroo is called a joey, called a joey, called a joey,

The baby kangaroo is called a joey all around Australia.

The joey kangaroo jumps in and out, in and out, in and out,

The joey kangaroo jumps in and out of its mummy's pouch.

 I've also created a cute koala song and headband craft...

...and for slightly older children, a koala book!  Here's a peak at some of the pages...

 ... and the adorable koala cover!

You may also enjoy the picture books you can see in this photo, they're another fun way to add some letter Kk fun to your days.

Of course the very best thing that starts with Kk is kisses! Remember to shower your little ones with lots of hugs and kisses, and have an awesome week! 


Sunday, October 25, 2020

Activities That Will Make Your Kids Jump for Joy

Are your children ready to jump for joy for letter Jj?  Let's see if we can wear them out with lots of fun learning activities!


I try to make sure our letter Jj learning happens in late October - because this is prime jack-o-lantern time, and we all love Halloween fun!  Here are some of the ways I've used jack-o-lanterns over the years to keep my preschool and kindergarten kiddos learning:


-Make an event out of your jack-o-lantern experience - it doesn't have to be just a quick pumpkin carving activity.  I like to start a couple of weeks before Halloween with a trip to our favorite pumpkin patch to check out all the "gourd-geous" pumpkins during letter Gg week.
Did you know pumpkins aren't all orange?  Sure, that's what we traditionally see in the grocery store every fall, but the children are always fascinated by all the different sizes, shapes and colors (and later flavors) of pumpkins. I always get a lovely variety for a display, and once Halloween is over I cook them all up for pumpkin muffins and pies... read all about that here and here.
 

We bring math into our jack-o-lantern experience by having the children suggest shapes for Jack's features, then voting for each feature, and tallying their responses.  

I do the cutting, but everyone takes turns to come up and help pull out the "guts".  You can call it fibrous strands if you want, but my kiddos LOVE that I call it guts - ewwwww!
Of course we have to pose with Jack - and leave him on the doorstep.  (See how to keep the learning going through the spring in this post)!
 

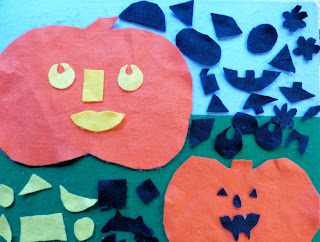
We keep the talk about shapes going with a simple felt activity, and the children get to create and recreate jack-o-lanterns all week long.

 We work on patterns with pumpkins (not technically jack-o-lanterns, but while we're on the theme let's get in all the math we can!) with a math center I made. Here it's in a pocket chart, but it works on a desk top too.


These math activities include jack-o-lanterns, along with lots of other fun Halloween themes, and we LOVE using the mini erasers from the Target Dollar Spot to complete them!


We mix yellow and red paint to make our orange paintings, and get a fine motor workout cutting and pasting features on our creations.


One of our hand print options for J is actually more of a fist painting of jack-o-lanterns (the other choices are jellyfish and jaguars).


Are your littles jumping for joy yet?  No?  Try digging out all the jewellery you're willing to let them play with (Mardi Gras beads and plastic jewels are great for this), then turn on some jazz and jump for joy to jazz in your jewellery...

...or head to the zoo and look for animals that jump.


Since J is also for jelly, and learning to write our letters is on the agenda, I introduce writing J with a little jelly on a plate.  We start by using our pinky fingers - which is sign language for the letter Jj!  They'll practice a lot when it's a matter of writing the J then licking their fingers, then repeating the process.... yum!


We make our upper case J by adding an orange jack-o-lantern on a green letter J, and cover the lower case j with lots of jewels.


What are YOUR favorite activities for letter Jj?  Comment here, or tag me in your social media posts: @paulabeckerman2399 on Instagram, and Paula's Primary Classroom on FaceBook.  I can't wait to see all the fun things you do!