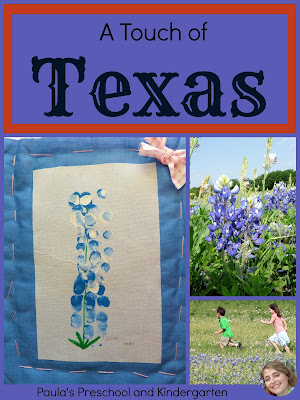
While many of the things I found were junk, I came across this little treasure too, and wanted to share.
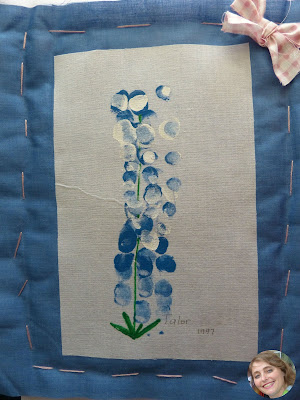
You may not be able to tell from this picture, but it is actually a quilted rectangle with several layers to it. It will take some adult preparation, plus 2 days of student work to complete.
To make it, you need:
-plain white cotton fabric
-plain blue cotton fabric
-iron-on 2-sided adhesive
-a layer of batting
-white, green, and blue fabric paint
-fine brush
-pretty scraps of a contrasting color
-embroidery thread
-a needle.
Cut the white cotton fabric, blue cotton fabric, and batting into equal sized pieces. Ours were 8.5 x 11". Set aside.
The next step needs to be completed for ALL the copies you will make at once. If you're going to make one project, only do it once. If you plan to make a class set of 22, you need to prep them all before you cut! Follow the directions for your iron on adhesive, attaching it to another piece of white cotton fabric - not the one you already set aside, another piece. After it is fused, cut a smaller rectangle. Ours was 5 x 8". This will be the part that gets painted. You want this piece to look perfect, so trim very carefully! When you are satisfied, center it on the plain blue cotton rectangle, and fuse it in place. You will now have all the pieces shown above, ready for your student artists.
On the first student work day for this project, the children will paint their bluebonnets. They'll paint some small leaves, and a long stem with the green paint and the brush. Then it's finger print time! If you can show your students real bluebonnets, or at least closeup photos of them, you'll see that the color isn't consistent over the whole flower.
The second student work day is for sewing. I strongly recommend having a bunch of prethreaded needles ready, or you will spend the entire time rethreading while the students wait! Young children can usually "get" the idea of the needle going down on one stitch, then up on the next, it's a pattern, so you're incorporating some mathematical thinking as well as a lot of fine motor skills as you do this. Keep the threads no more than 18" long to start, it isn't enough to go all the way around, but it seems to be as much as little hands can manage without tangling. Layer your pieces: white backing, batting, blue painted piece, and safety pin in place so it isn't going to slip while the children work.
Students sew the embroidery thread around the edge. It won't look picture perfect, but they and their families will think it is beautiful! Finish it off by hot gluing a small bow or some buttons in one corner. (Our bows were tied in fabric scraps 1" x 12".)
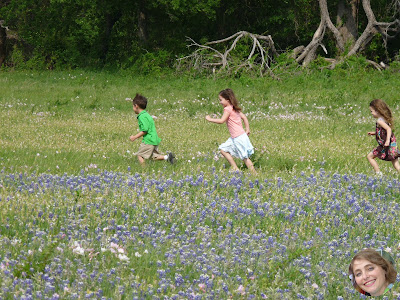
If you've read this far, you are a brave teacher/parent, bravo! Yes, this project does take a lot of adult supervision and guidance. If you can get some volunteers to help you do this, take all the help that is offered. The reason we did this, even with all the time and effort involved, is that it is a beautiful memento of those little hands working. Children are proud of the results, mommies hung them up to display, and everyone remembered what bluebonnets look like, and that they are the state flower of Texas. These make fantastic Mother's Day gifts a few weeks after the bluebonnets are finished blooming!
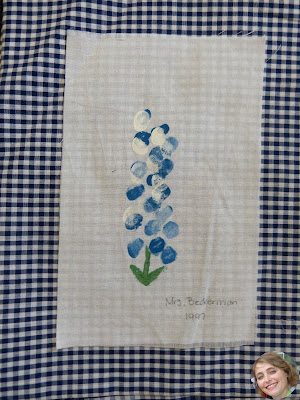
Some of you are thinking about all the pretty fabrics you could use instead of the plain blue one behind the painting. I know I thought it would look fantastic with a nice gingham. Here's why we used a solid color: the background shows through and distracts from the painting.
Here's another Texas learning activity I want to share too.
This is my Texas bingo game, for reviewing 12 different symbols of Texas: armadillo, the Lone Star, pecans, the Texas Flag, longhorn cattle, cowboys, The Alamo, the Seal of the State of Texas, prickly pear cactus, bluebonnets, Texas, and mockingbirds. Children love to make games out of everything - it's just more fun that way - so I put this social studies learning into a bingo format. There are 24 game boards with the colorful outlines, and 24 in a printer friendly format. I used some cool star buttons as playing pieces, but you could use any kind of small manipulative that's handy.
Thanks for stopping by my blog, bye y'all!


No comments:
Post a Comment